


Disclaimer: This post may contain Amazon affiliate links. Sudachi earns a small percentage from qualifying purchases at no extra cost to you. See disclaimer for more info.
Featured Comment:
“I followed this recipe exactly and it was so easy! I’ve never had or made ume syrup before, but gave it a try at my husband’s request. He was so impressed with how great it was! We enjoyed it as ume soda. I’m so appreciative when I find authentic Japanese recipes in English, it makes cooking things my husband likes a bit easier for me! I’ll be sure to make this recipe every ume season! Thank you!”
– Yenna
What is Ume Syrup?
Ume Syrup is made with Japanese plums, also known as “ume” (梅). This distinctively tart and aromatic fruit was introduced to Japan from China and is most commonly used to make umeboshi (pickled plums), umeshu (plum liquor) and plum syrup. Despite being known as a Japanese or Chinese plum, ume is more closely related to the apricot.
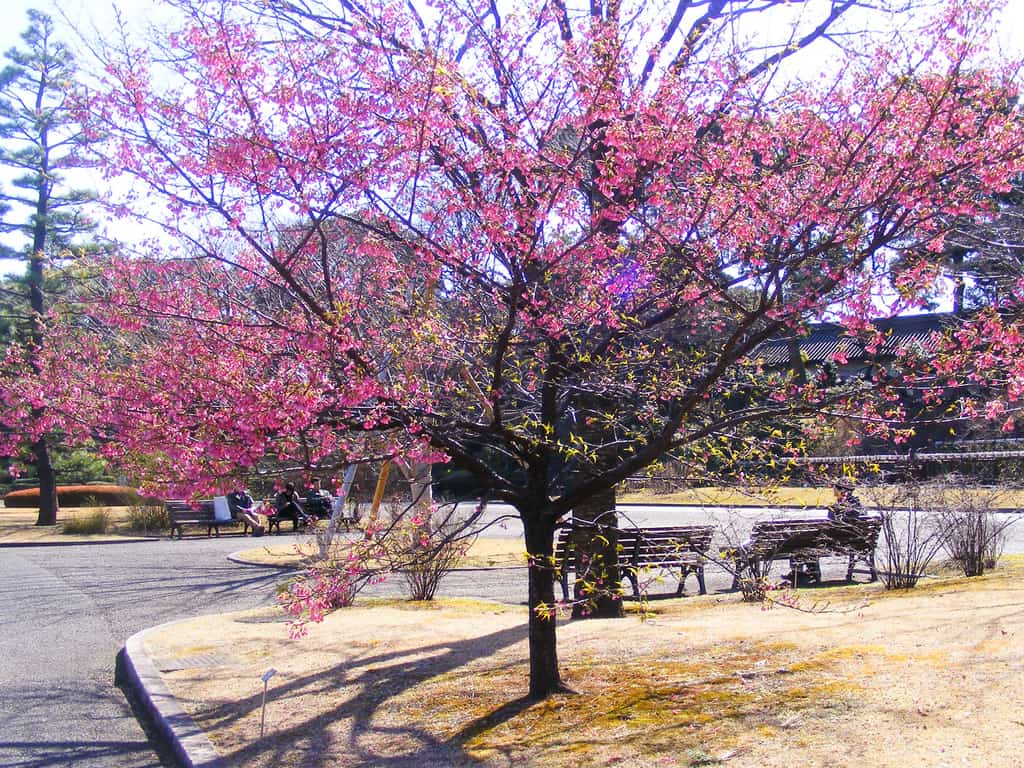
The ume blossom tree usually flowers in January or February, marking the start of spring. The flowers are deep pink with a wonderful floral fragrance. Then, when the rainy season arrives in Japan in around June, supermarkets are stocked up with fresh ume and everything you could need to make ume recipes! Actually, in Japanese, the word for the rainy season is “tsuyu” (梅雨), which means “plum rain”.
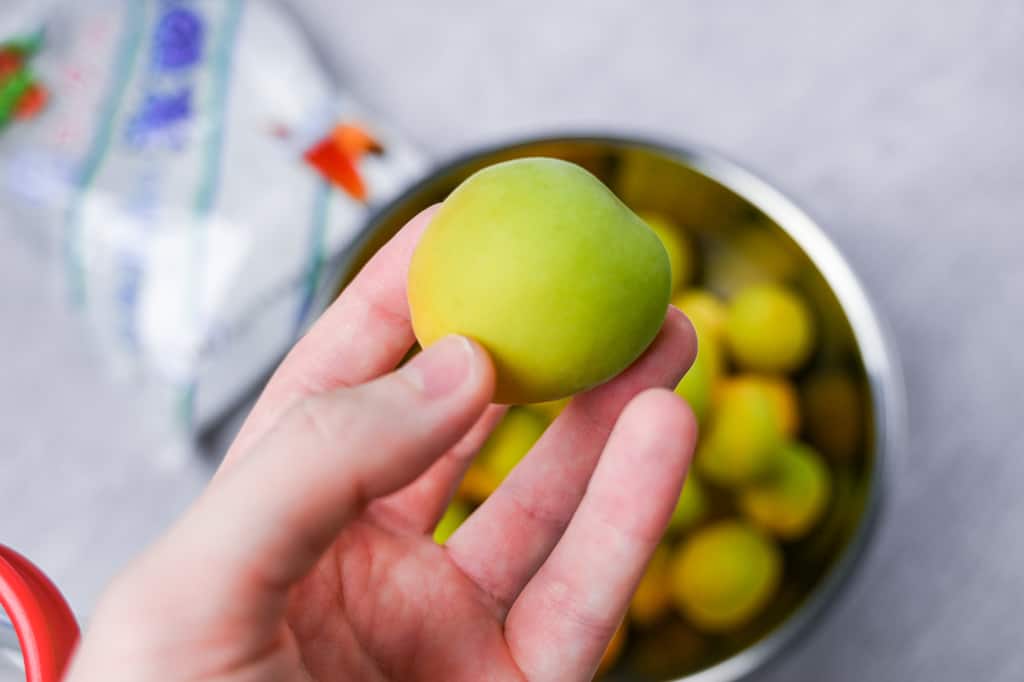
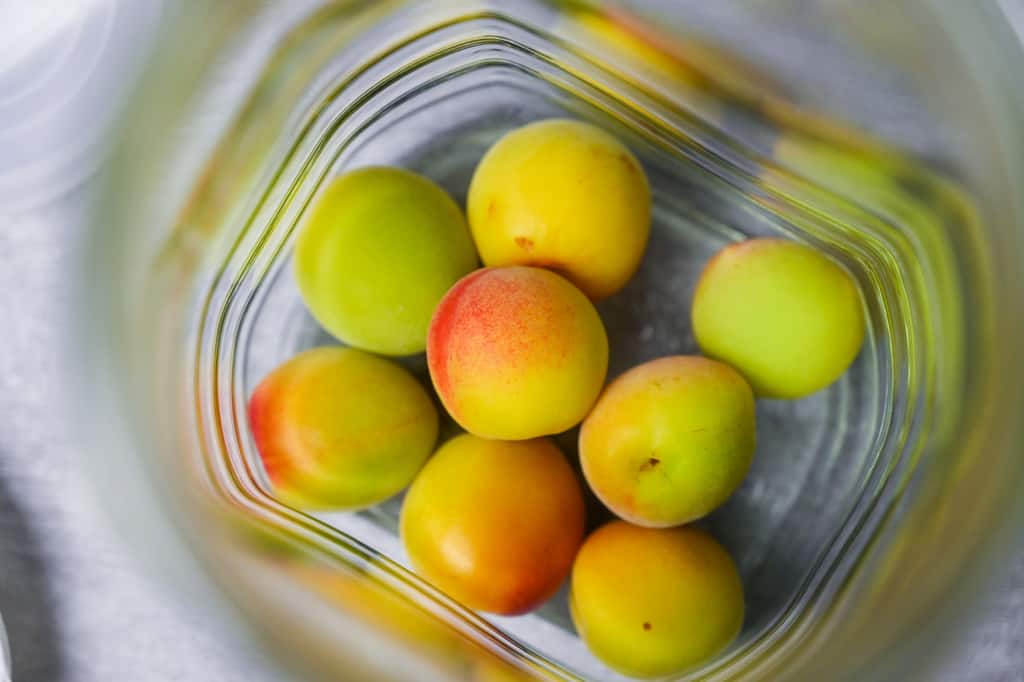
The brilliant green-colored unripe ume is called “ao ume” (青梅). When it ripens and turns to a yellow-orange it becomes “kanjuku ume”. Green plums are most commonly used for syrups and liquor, whereas ripe ones are ideal for making pickled plums and ume jam.
Ingredients & Equipment
- Japanese Plums (Ume): This recipe works best with green unripe ume. Choose vibrant, round fruits with taut skin and no blemishes or spots. Bruised fruit is prone to mold and bacterial growth, so be sure to discard any damaged ones.
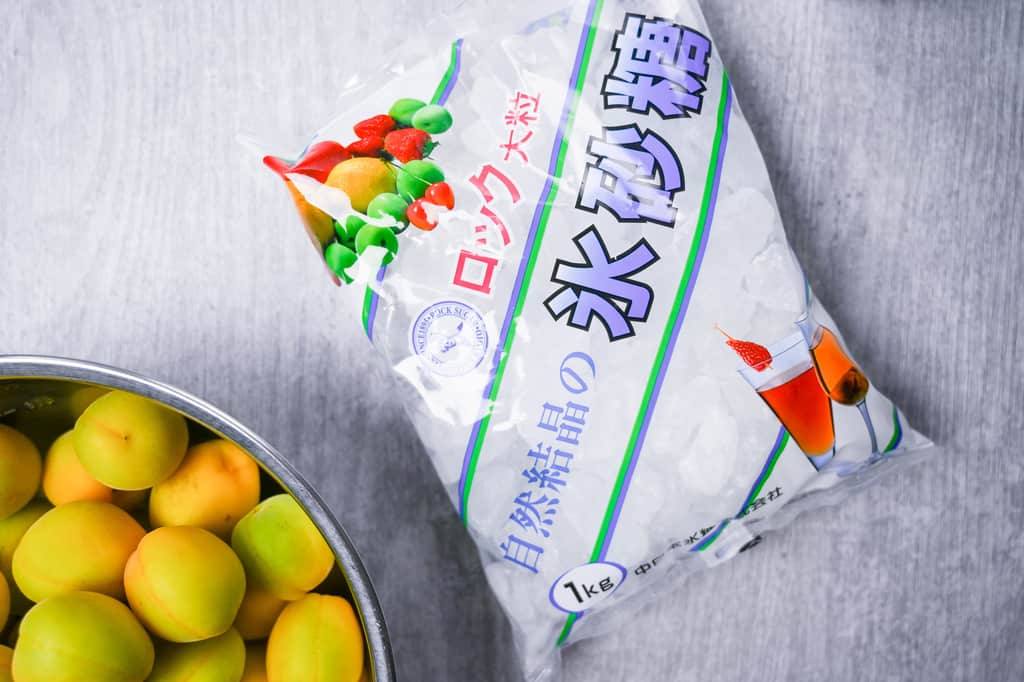
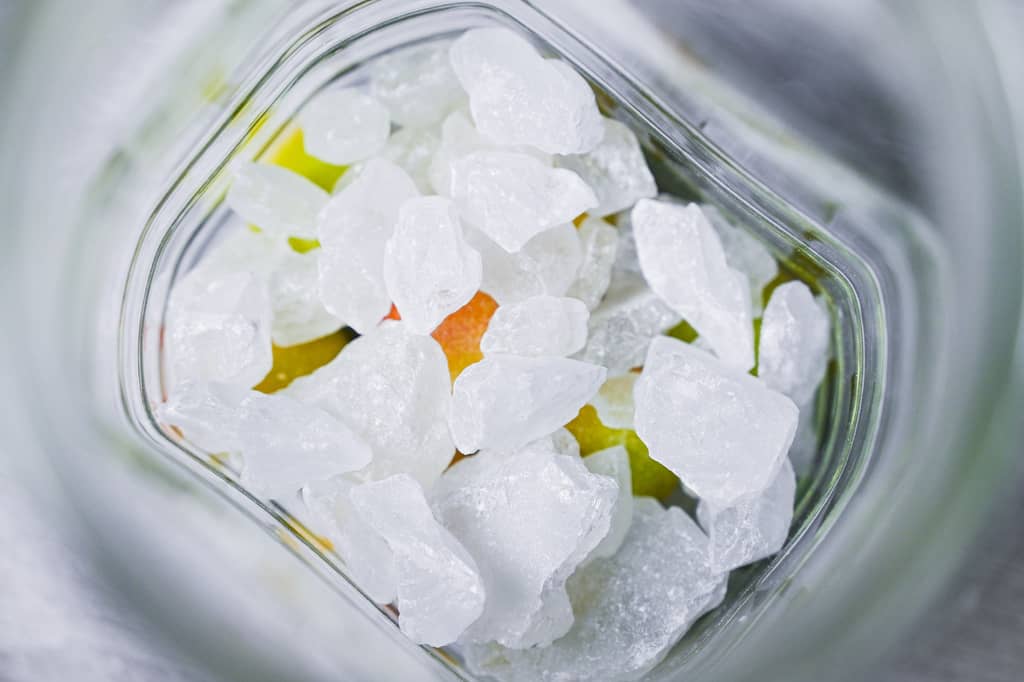
- Rock Sugar (Kōrizato): Kōrizato (affiliate) is a pure sugar that enhances the ume flavor better than others. Its large surface area dissolves slowly, matching the juice extraction rate from the ume, ensuring a robust flavor. Finer sugar melts too quickly and might not extract all of the flavor of the plums, resulting in a weaker syrup.
- Toothpick or Cocktail Stick: A handy tool for removing the stems from the ume efficiently.
- Glass Jar with Airtight Lid (2 Litre): A crucial container for making ume syrup, ensuring that the mixture remains uncontaminated and can properly infuse over time. I recommend this kind of container. (This is the closest I found to the ones we use in Japan.)
Visual Walkthrough & Tips
Here are my step-by-step instructions for how to make Ume Syrup at home. For ingredient quantities and simplified instructions, scroll down for the Printable Recipe Card below.
If you prefer to watch the process in action, check out my YouTube video of this recipe for a complete visual walkthrough!

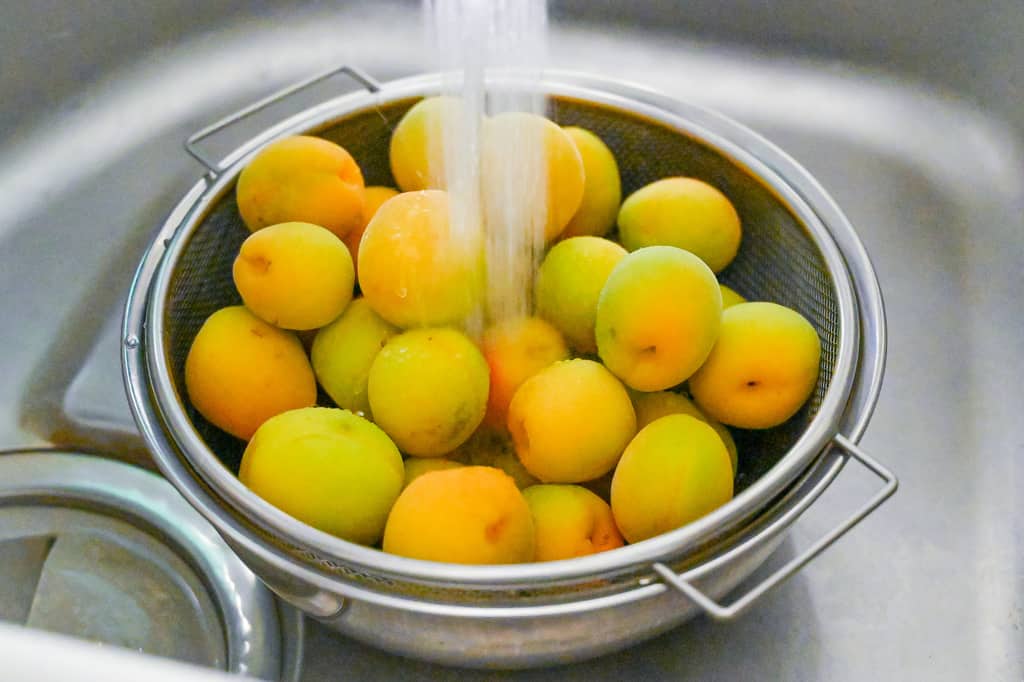
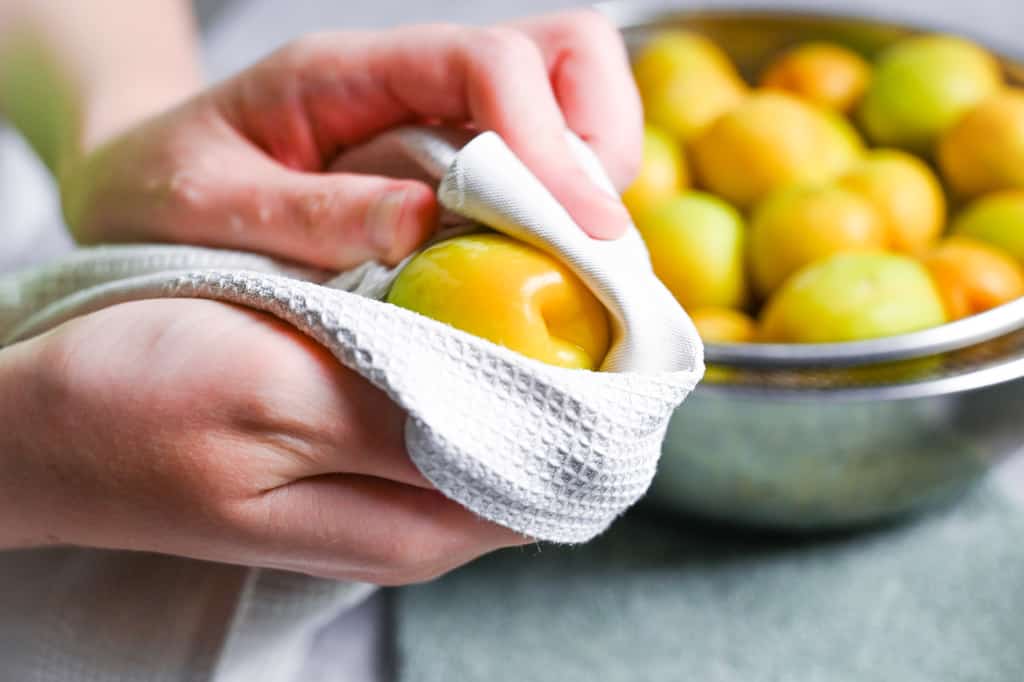
Wash your hands thoroughly before you start, then wash your ume with warm (not hot) water.
Lay out a few clean tea towels. Use one to gently dry the plums and the other to spread them out in a single layer.
Carefully remove the stems with a toothpick to avoid bitterness in the syrup.


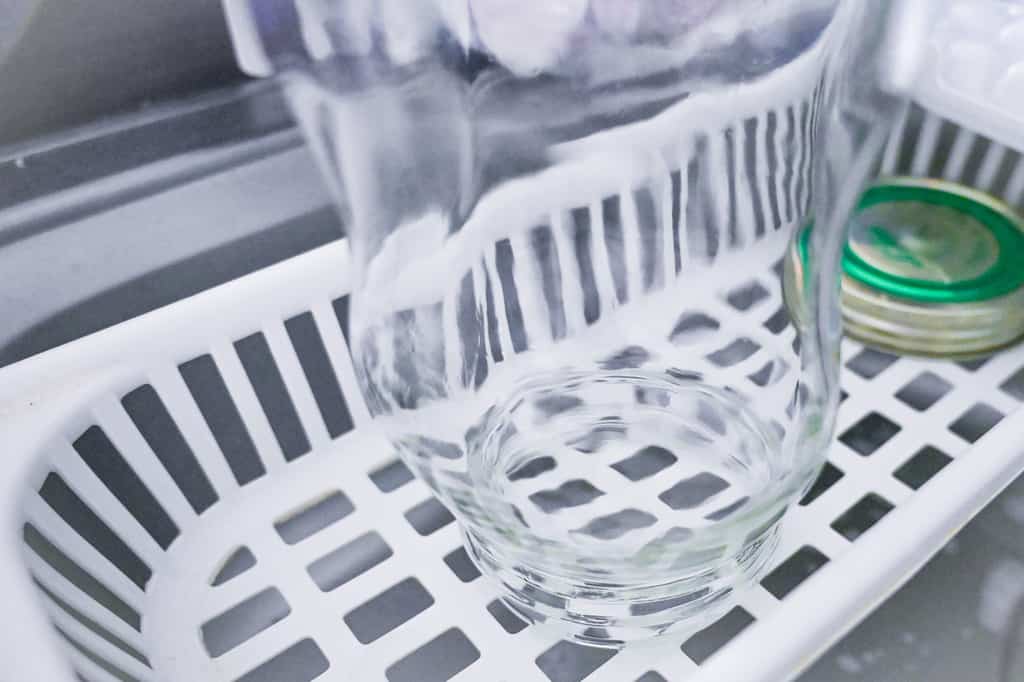
Once the plums are dry and destemmed, place them in a clean ziplock bag or a sealable container. Store them in the freezer for at least 24 hours to prepare them for syrup making.
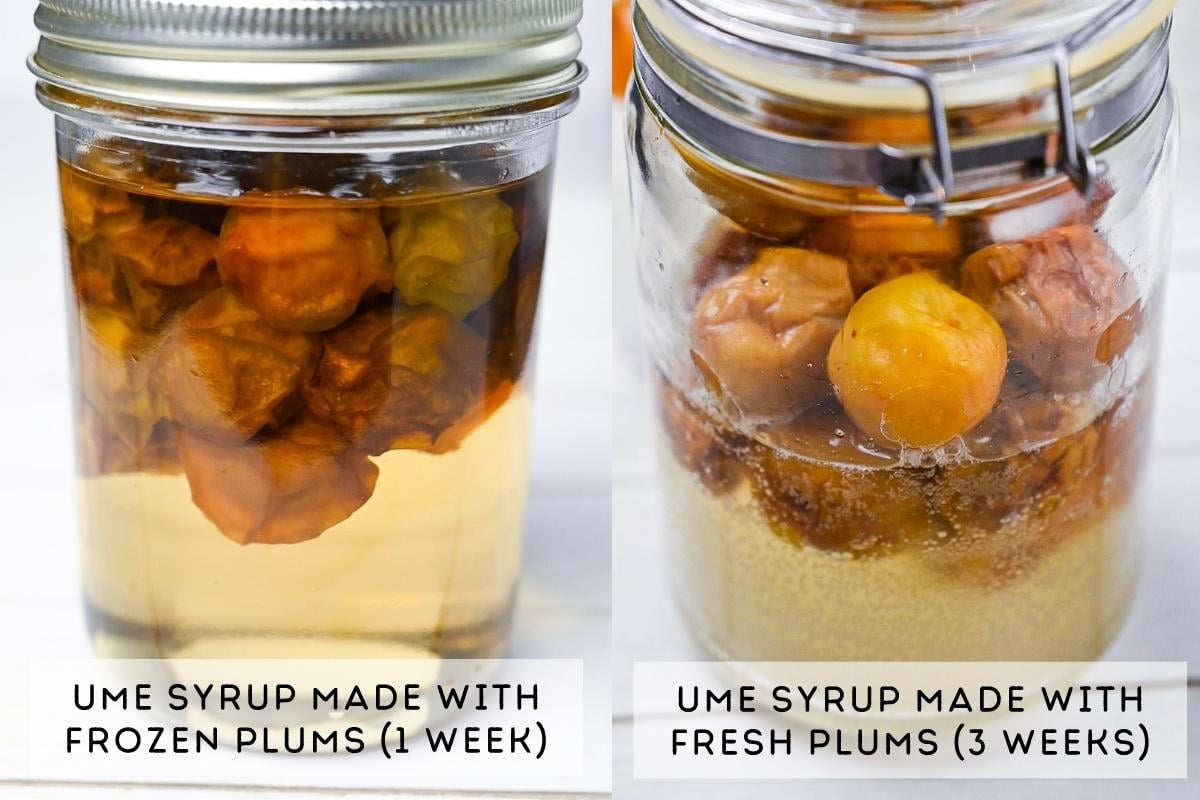
While using fresh ume is more common, freezing them speeds up juice extraction and results in a better-tasting syrup. When frozen, the water inside expands and turns to ice, destroying the fruit’s internal structure. When defrosted, the plum becomes mushy, and the juices leak out onto the sugar and turn into syrup very quickly.
Although ume syrup is typically made during the rainy season and enjoyed during the summer, freezing the ume allows you to make it any time of year! Ume can be kept frozen for 8-12 months. To avoid freezer burn, be sure they are thoroughly dried and stored in airtight containers.
Fill a glass jar with boiling water and let it sit for a few minutes to sterilize.
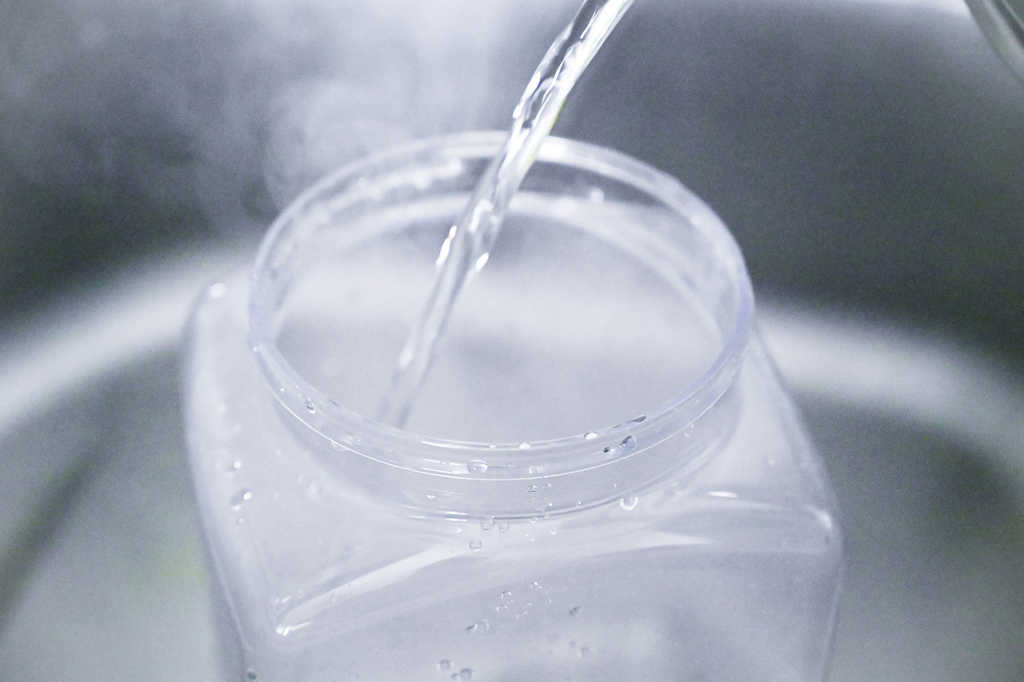
After a few minutes, carefully pour out the water (use oven gloves, as the jar will be very hot). Place the jar on a clean drying rack to air dry.
If in a hurry, wipe it with a paper towel blotted with some alcohol.
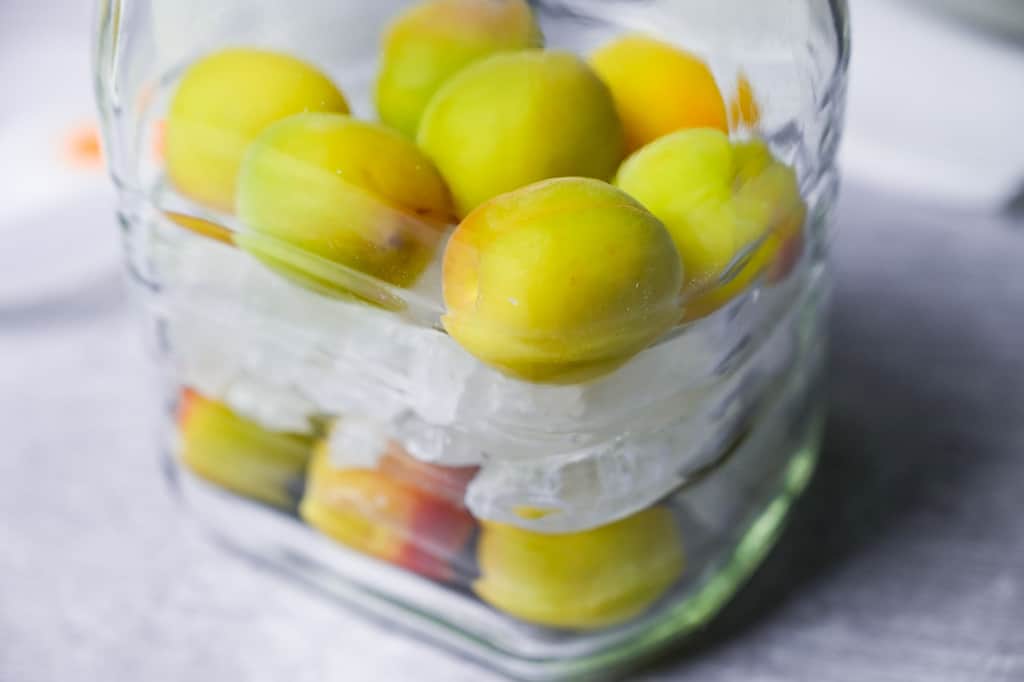
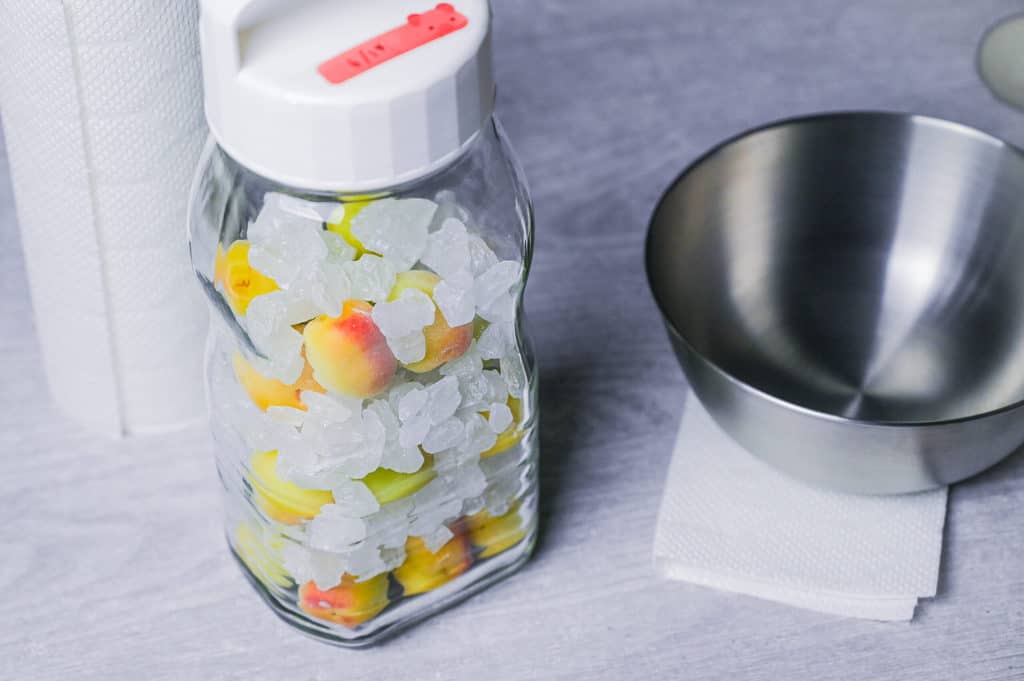
Measure out rock sugar an equal weight to the plums. Place a layer of frozen ume at the bottom of the sterilized jar, then top with a layer of rock sugar.
Continue alternating layers of plums and sugar until the jar is full or all ingredients are used.
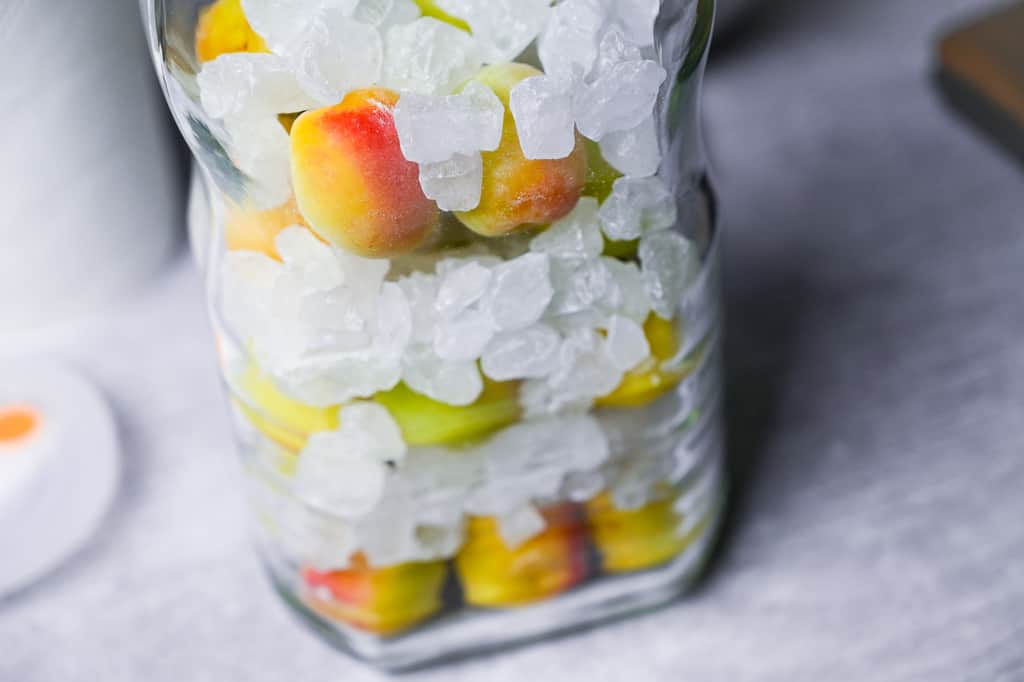
The ratio of ume to rock candy is 1:1. In my recipe, I use 500g of plums and 500g of rock sugar. This will yield a little somewhere between 500-750ml of syrup depending on how juicy the ume is.
I wouldn’t recommend reducing the sugar as this helps preserve the plums. The rock sugar slowly dissolves around the plums, absorbing the flavor and sinking to the bottom.
Seal the jar tightly and store it in a cool, dark place like a cupboard or basement. Tilt the jar daily to mix the sugar and plums around, ensuring even syrup formation.
The ume syrup will be ready in 7-10 days. Enjoy it diluted in a drink (mix 1 part syrup with 4 parts water/soda), or drizzle it over shaved ice, yogurt, and more.

How to Store
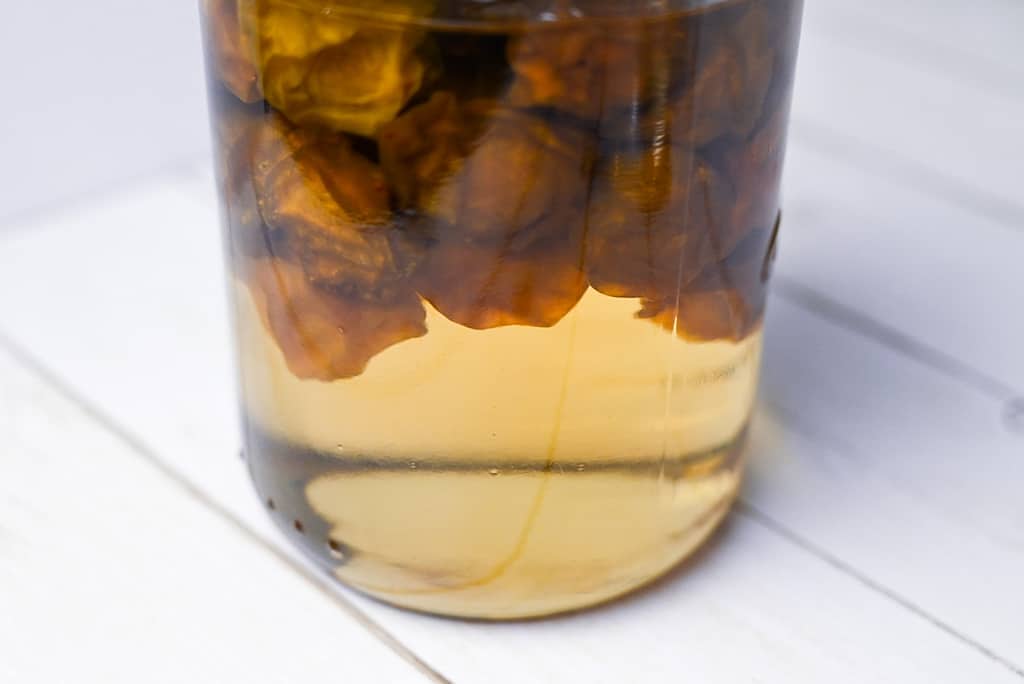
Once the juices have finished extracting and the sugar has completely dissolved, remove the ume and discard them. I recommend taking the ume out of the syrup within 2-4 weeks.
You might find that there are still a few lumps of sugar in the syrup; you can melt them by heating the syrup in a pan on the stove. (Make sure to take the ume out before heating.)
Once the last sugar rocks are dissolved, transfer the syrup to a smaller sterilized jar and keep it in a cool, dark place for 2-3 months or in the fridge for up to one year!
Ways to Use Ume Syrup
Ume syrup can be used to make various drinks and desserts. Here are some common ways to use it:
Ume Juice
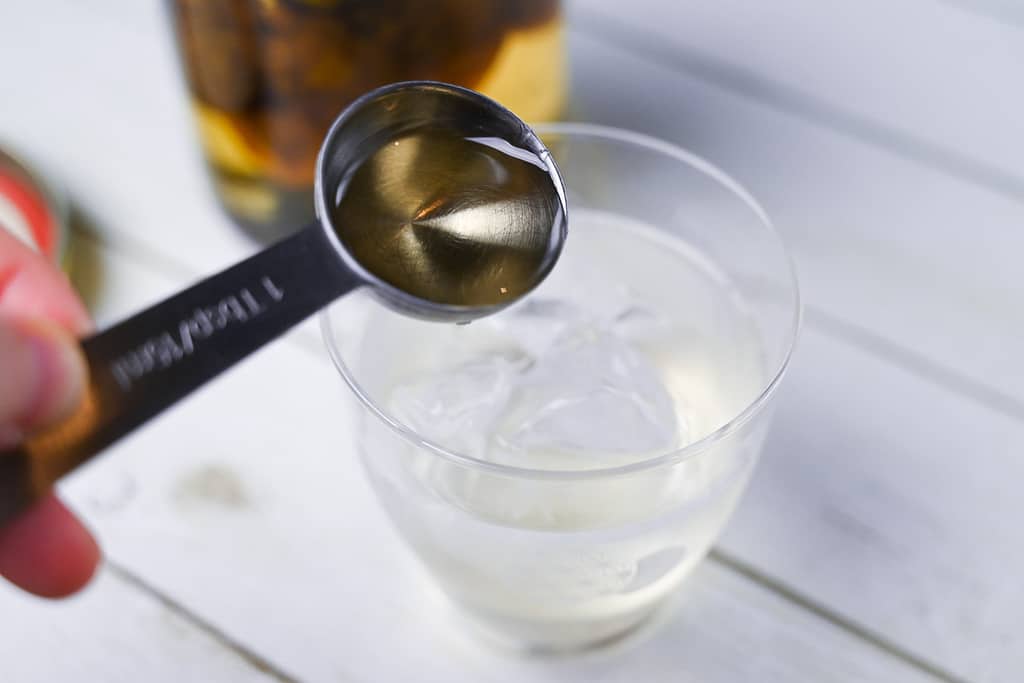
Ume syrup is most commonly used to make “ume juice.” The syrup is mixed with sparkling water and ice and enjoyed in the summer.
You can add the syrup to taste, but for a guide I generally use a ratio of 1 part ume syrup: 4 parts soda/water.
100ml of syrup would need 400ml of water or soda. This becomes 500ml (2 cups) good for 2-3 servings.
Ume Jelly
I like to make ume jelly a bit stronger/sweeter than ume juice. So here’s my recommended recipe using gelatin or kanten.
- 150ml Ume syrup
- 350ml water
- 1 tbsp gelatin powder + 3 tbsp water OR 1 stick (4g) kanten powder
Gelatin recipe: sprinkle the gelatin powder into a small bowl of 3 tbsp of warm water. Wait 5 minutes for it to bloom and then microwave it for 20-30 seconds. Mix with 150ml ume syrup and 350ml water, transfer to molds and chill in the fridge for 3 hours.
Kanten recipe (plant-based): Mix 1 stick of kanten powder with 350ml of water in a saucepan. Boil for 2 minutes, then turn off the heat and mix in 150ml ume syrup. Cool to room temperature and chill in the fridge until firm and cold.
Other ideas
Here are a few more ideas for using ume syrup:
- On shaved ice
- In iced tea
- In smoothies
- With yogurt
- For cocktails
FAQ
Here are answers to frequently asked questions I have received across all platforms, including here, YouTube, and Pinterest. If you have any questions, feel free to send them to me anytime! It will be a big help for everyone in this community!
Japanese ume cannot be eaten raw. Instead, it’s most commonly made into umeboshi (梅干し), a pickled salted plum, or umeshu (梅酒), a sweet plum liquor.
The green ao ume are best for making umeshu and ume syrup, whereas the ripened yellow ume are best for making umeboshi or ume jam.
Unfortunately, it can be hard to find fresh ume plums if you don’t live in Japan.
I recommend checking your local Asian supermarket, especially around May-June when they’re in season. If you know where to buy them, please comment below so we can add them to the post and help our readers!
Koorizato (氷砂糖) is one of the purest kinds of sugar, so this helps the flavor of the ume shrine more than any other kind of sugar.
In addition to this, the large surface area means that the sugar dissolves slowly. This is important because it dissolves at a similar rate as the extraction rate of the juices in the ume.
Using sugar with small granules will melt too quickly and result in a syrup with a weaker ume taste.
I usually just use them to decorate the drink. The process of making the syrup draws out all the moisture and juices from the plum, leaving just a thick skin and seed behind. They’re not very nice to eat after using them to make syrup, however some people use the leftovers to make jam.

I hope you enjoy this Ume Syrup recipe! If you try it out, I’d really appreciate it if you could spare a moment to let me know what you thought by giving a review and star rating in the comments below. It’s also helpful to share any adjustments you made to the recipe with our other readers. Thank you!
Other Japanese Drink Recipes

Japanese Ume Plum Syrup
Equipment
- 2.2 Liter Pickling Jar with airtight lid
- 1 Gallon Pickling Jar
- Bamboo Skewers or toothpicks
Ingredients
- 500 g Japanese plums (ume) (ume) before freezing
- 500 g rock sugar (korizato)
My recommended brands of ingredients and seasonings can be found in my Japanese pantry guide.
Can’t find certain Japanese ingredients? See my substitution guide here.
Instructions
Preparing the plums
- Wash your hands thoroughly and then wash 500 g Japanese plums (ume) with warm water.

- Next, take a few clean tea towels. Use one tea towel to gently pat the plums dry, and another one or two to lay them out to dry fully.
- Remove the stems with a toothpick and discard.
- Once all of your plums are dry and destemmed, place them in a ziplock bag or sealable container and store them in the freezer for at least 24 hours.
Making the Syrup
- Sterilize the jar by filling it with boiling water and letting it sit for a few minutes. After a few minutes, pour the liquid out. (Use protective gloves to hold the jar as the glass will be very hot.)
- Place the jar on a clean drying rack and allow to air dry. (If you're impatient, wipe with a paper towel blotted with some alcohol.)
- Measure out 500 g rock sugar. Place a layer of frozen ume at the bottom of the jar, then top them with a layer of the rock sugar.
- Continue to add layers of plums and sugar until the glass is full or you've used up all the plums and sugar. Seal the lid tightly and then store in a cool dark place.
- Tilt the jar every day to move the sugar and plums around. The ume syrup will be ready in 7-10 days.

- Remove the ume within 2-4 weeks and transfer the syrup to a smaller (sterilized) airtight jar.TIP: If your syrup still has lumps of sugar, melt it in a pan over a low heat until completely dissolved. Cool before use.

- Enjoy it in drinks, poured over shaved ice, yogurt, etc.Store in a cool dark place for up to 3 months, or up to 1 year in the fridge!

I followed this recipe exactly and it was so easy! I’ve never had or made ume syrup before, but gave it a try at my husband’s request. He was so impressed with how great it was! We enjoyed it as ume soda. I’m so appreciative when I find authentic Japanese recipes in English, it makes cooking things my husband likes a bit easier for me! I’ll be sure to make this recipe every ume season! Thank you!
Hi Yenna,
Thank you for your lovely comment! I’m happy to hear that you and your husband enjoyed this recipe and my website was helpful! 🙂
Yuto